After a record defeat to Australia in the first Bledisloe game of 2019 and 6 changes to their team for the return fixture, there has been a suggestion in some quarters that the All Blacks might be panicking ahead of Bledisloe 2. On the face of it, a 16-16 draw with South Africa, and the error-filled 20-16 win over Argentina before it, do suggest that New Zealand’s ability to blow teams away might be slipping. This analysis will look at the All Blacks attack in 2019 and why, rather than falling apart, it looks like it’s finally starting to come together.
Before having a look at the All Blacks attack this year, it’s important to see how they were playing in 2018, and more specifically, how the roles of a particular group of forwards was quite different.
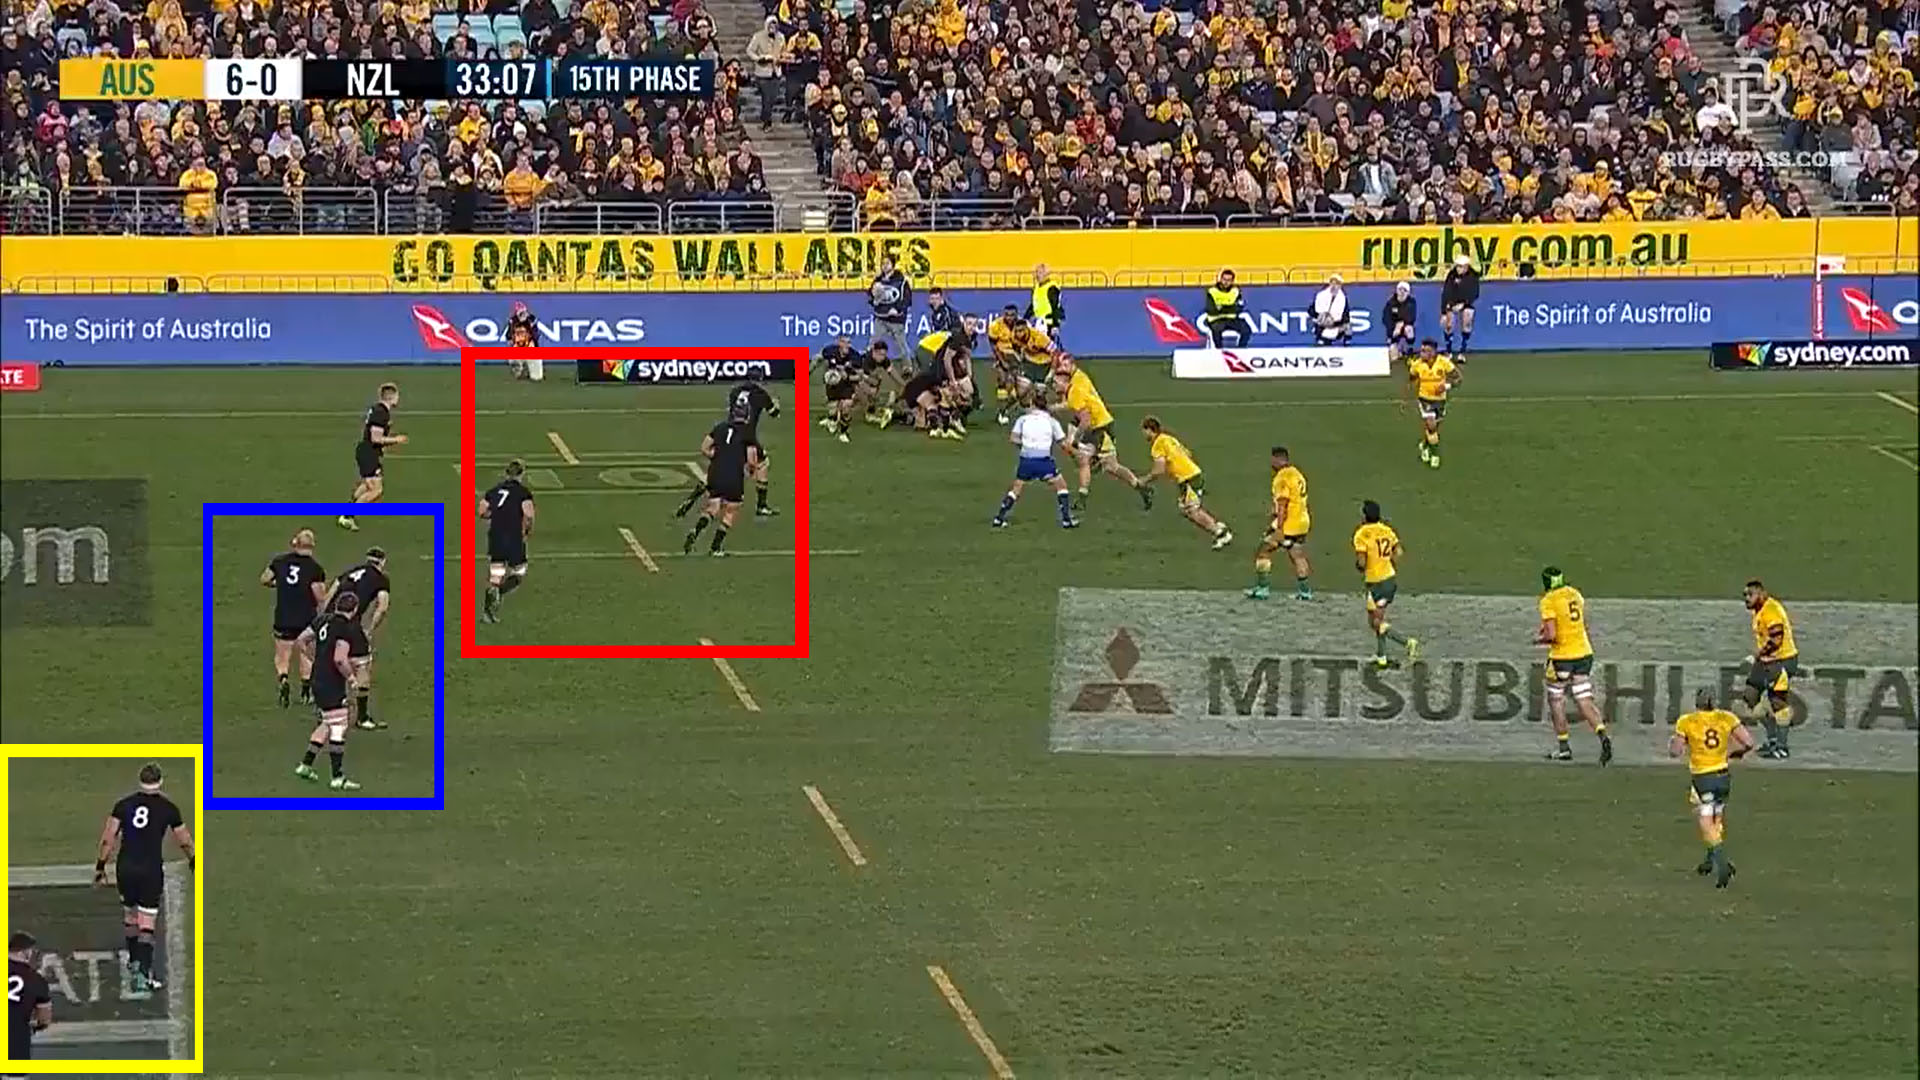
This is how the All Blacks forwards generally lined up in attack in 2018. You have a group of three forwards near the ruck, another three in the midfield and finally, two more forwards out wide.
The 6, 7 and 8 would alternate between being the widest player in the middle pod and standing out wider again on the wing. When the 8 All Blacks forwards lined up in attack, this formation would often look like a 3-3-2, as in picture, sometimes a 3-4-1 and other times a 1-3-3-1, depending on where that extra backrow stood.
If this sounds confusing, it’s supposed to be. The goal of this constant switching is to confuse opposition defences out wide. While this all sounds very clever, as we roll on the clip of this attack, focus on how the red group of forwards take the ball on.
Sam Whitelock’s carry here is quite static and with Australia defending from the touchline, they can blitz off the line to make the tackle that pushes New Zealand back. As a result, the All Blacks never get to use those well-positioned forwards wider out in the yellow group.
You might argue that New Zealand ended up winning this game 38-13 while scoring 6 tries so, what’s the issue? When you look at where those scores came from, it becomes more apparent. Of the 6 tries that New Zealand scored against Australia in this 2018 game, only 1 came from using this 3-3-2 formation in phase play.
That might be good enough for most teams but after two losses in 2018 to blitz defence teams in South Africa and Ireland, and with Ireland being particularly good at keeping the ball for long periods, the All Blacks felt they needed to give their phase play a re-think. The All Blacks are in the business of winning World Cups and as 2018 showed, confusing backrow positional switches out wide and exceptional counter-attacking ability might not be enough.
Roll on to the 2019 Bledisloe and New Zealand are still losing games. However, there has been a noticeable change in how they use a particular group of forwards in attack. As my previous article Beating the Blitz explained, many teams are now using two or three forwards as decoys in the 15 metre channels to stop defences blitzing up. The All Blacks are also doing this too, but what we’re going to focus on is the contrast in how they use their first pod of forwards differently from 2018 to 2019.
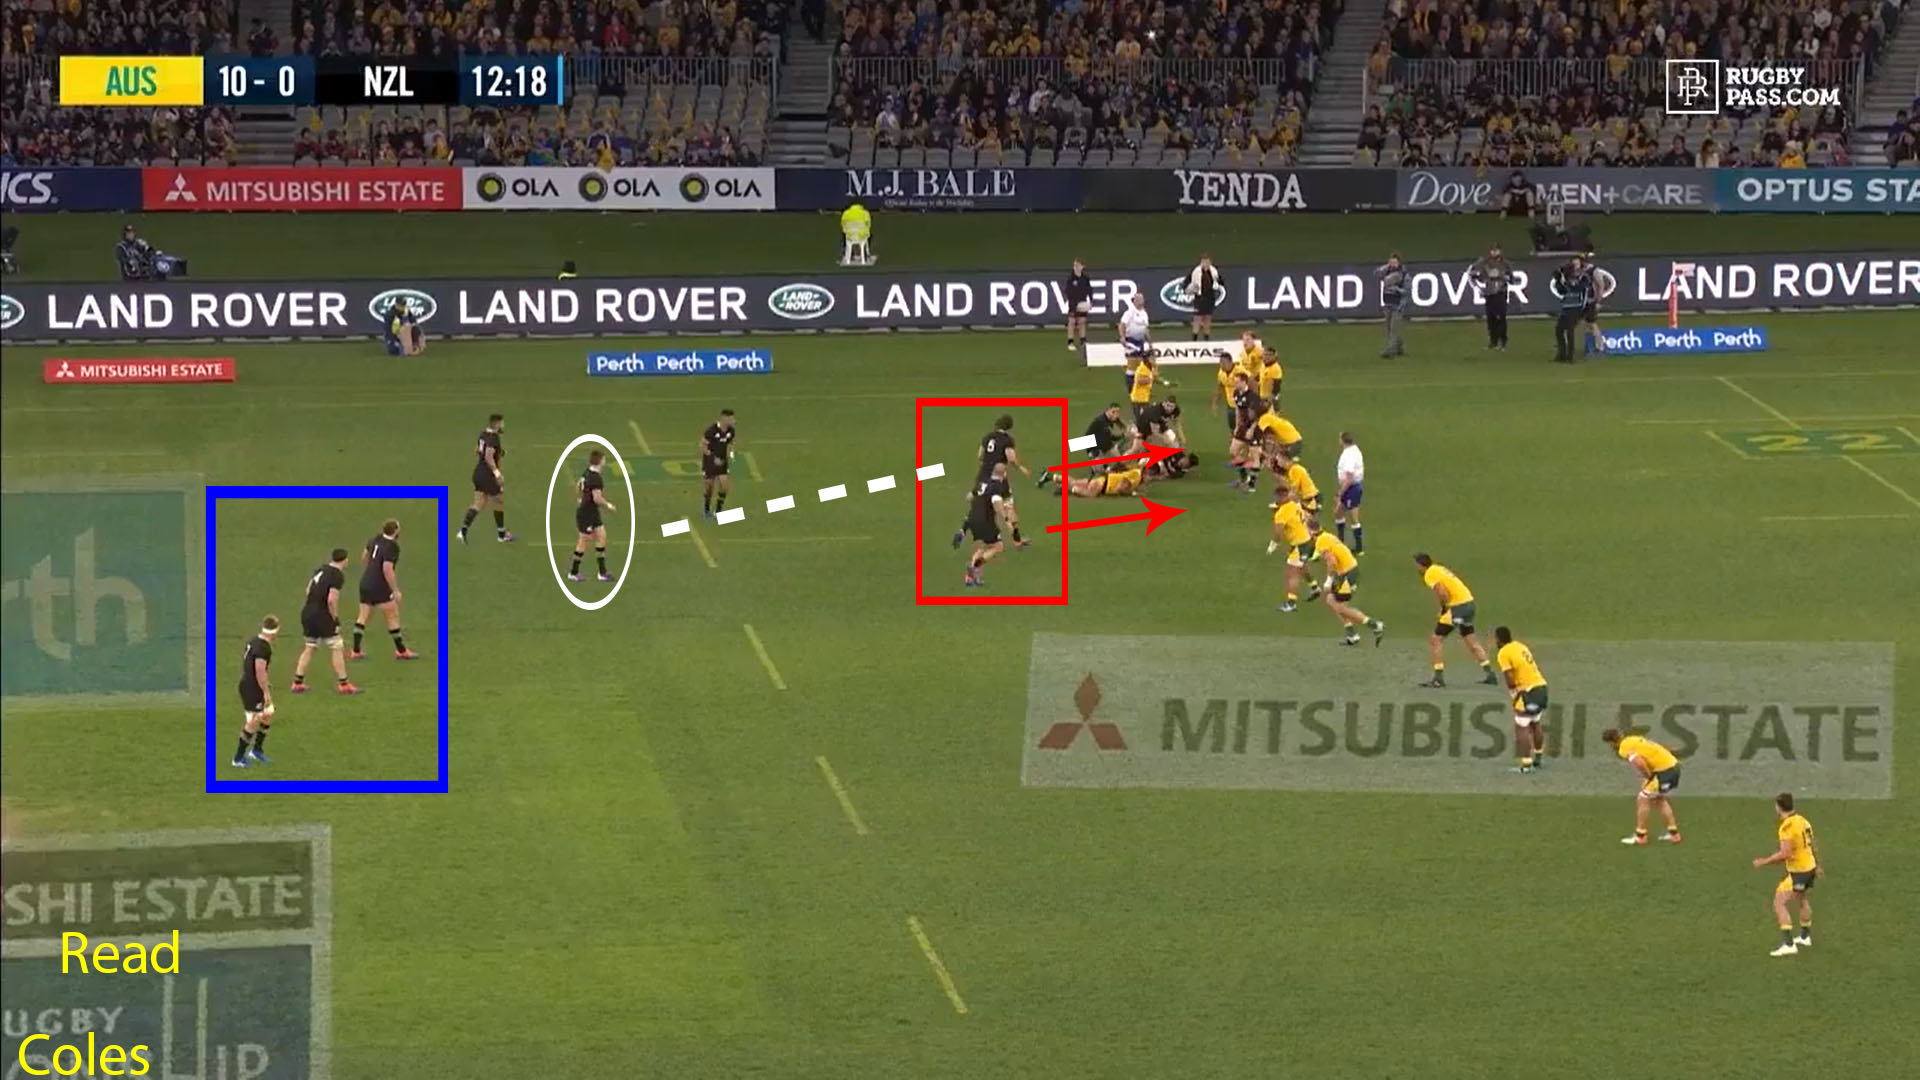
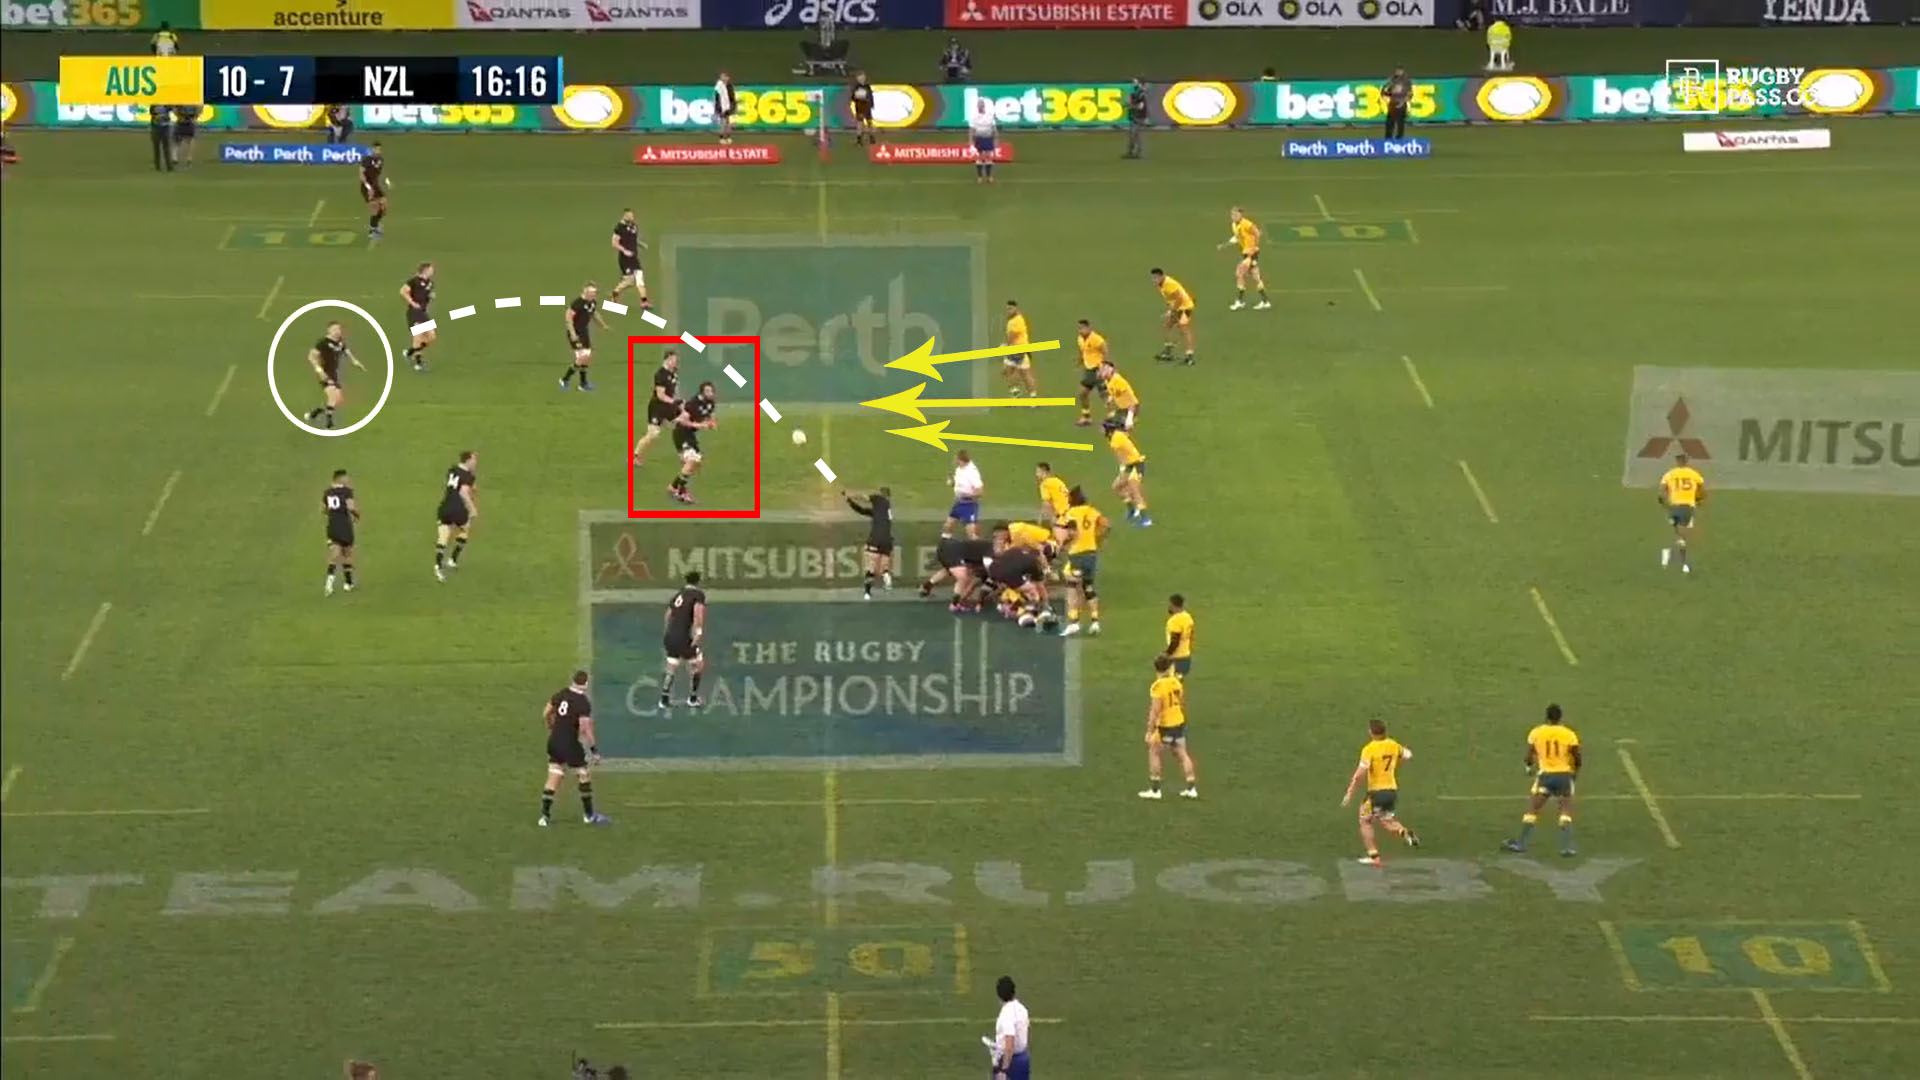
This image looks quite similar to the last one in 2018, with three forward in the midfield and two more in Read and Coles hidden out of shot. Australia are in a similar defensive position too-arguably a better one with the referee ignoring the defensive line creeping up-and are ready to blitz. The difference is that instead of Whitelock taking the ball from a static position in a pod of three and getting pushed back, himself and Franks are used as decoys to pass behind to Barrett-circled-and get the ball wider.
With Australia’s defensive line now split in midfield and the majority of their players stuck on one side of the ruck, the All Blacks use the next phase to create a mismatch that draws the cover defence up and Jack Goodhue kicks through for New Zealand’s first try of the game.
However, what makes the All Blacks use of the double decoy of forwards different to other teams is that they’re not just using them in the 15 metre channels, they’re now using them everywhere.
Four minutes later we can see Whitelock plus Scott Barrett being used to distract the Wallabies defence again, and again we have a try. This time the ball goes back to Beauden Barrett-circled- before ending up with Reiko Ioane on the wing for the score. Despite having only 35% of the possession in this game, New Zealand would use this double decoy tactic 21 times in the Bledisloe 1.
Having already garnered two tries from their new ploy, the All Blacks would get another one in the 55th minute.
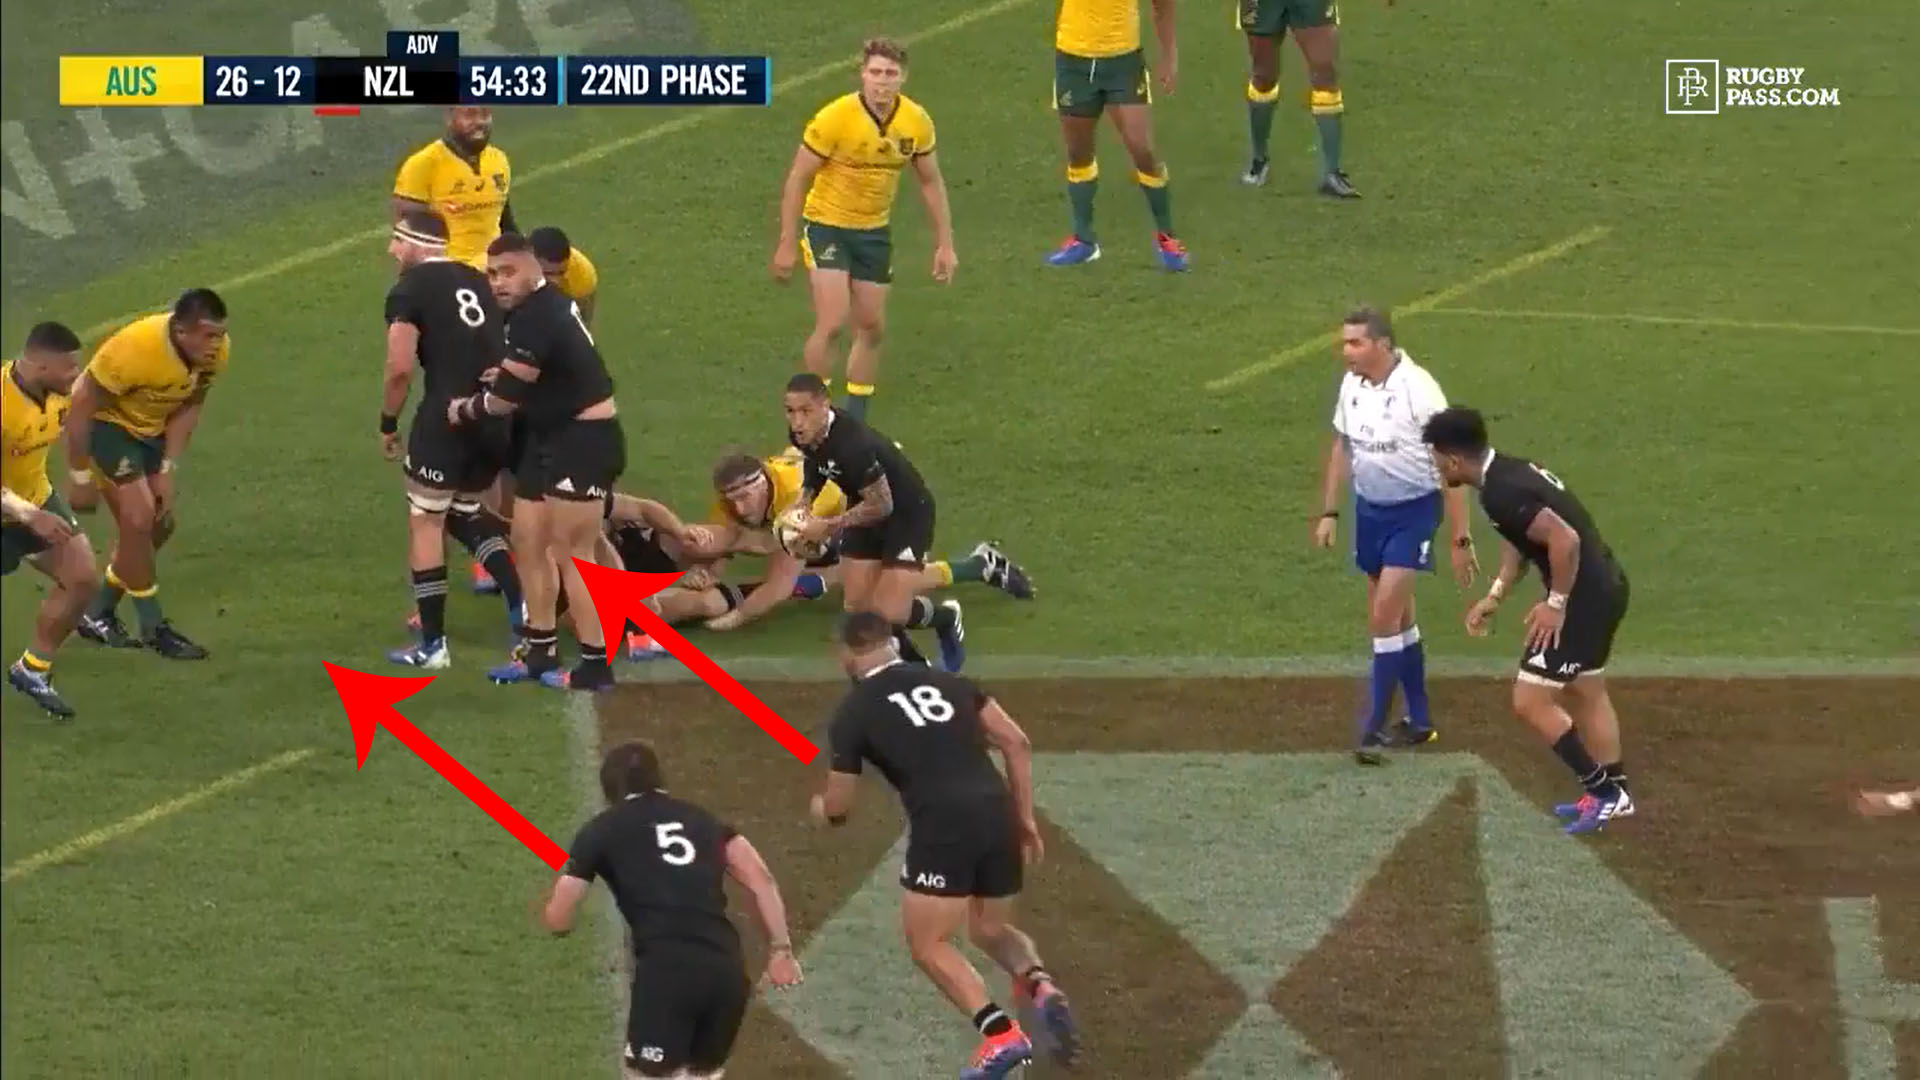
Whitelock, plus one other tight-five forward, are the constant in these decoys that this time produces a try for Beauden Barrett. You may notice in the GIF below the little block that Whitelock puts on Australia’s Michael Hooper as he runs his decoy line. Seconds later it’s Hooper who can only grasp at Barrett and after struggling to one try the previous year, a tactical tweak has the All Blacks scoring three in 2019.
While there have undoubtedly been a number of error-strewn performances from the All Blacks in 2019, the adjustment to employing a new double decoy tactic may go some way to explaining why. There were always going to be high error counts when introducing a new attacking system but with 25 turnovers against Argentina, 19 against South Africa and only 14 against Australia, New Zealand are getting more adept at their phase structures with every game.
Faced with a 2018 that was sub-par by the All Blacks’ high-standards, New Zealand have taken what is world-class about their attacking strategy; their counter-attacking excellence and bewildering backrow positioning, and added to it. While the score line might not be showing it as of yet, there are plenty of signs that having worked through the growing pains early in 2019, the All Blacks attack is ready to take off in Bledisloe 2 and beyond.
If you’ve enjoyed this article and would like to read more, you can click on the ‘W’ WordPress icon at the top of the page to see an index of all the articles on the site.
There are also links to the new EK Rugby Analysis Twitter account on the top and bottom of the pages if you want to follow any future updates on the site. Thanks for reading.
EK
